Creating a Search
Important - For practices with a hosted server, for example AEROS, you must watch the videos on your local desktop. To do this copy and paste the url for this web page into your local browser. Local health board restrictions may also affect access.
These are the basic steps to creating an ad-hoc search:
- From Search and Reports, select Ad-hoc search
 .
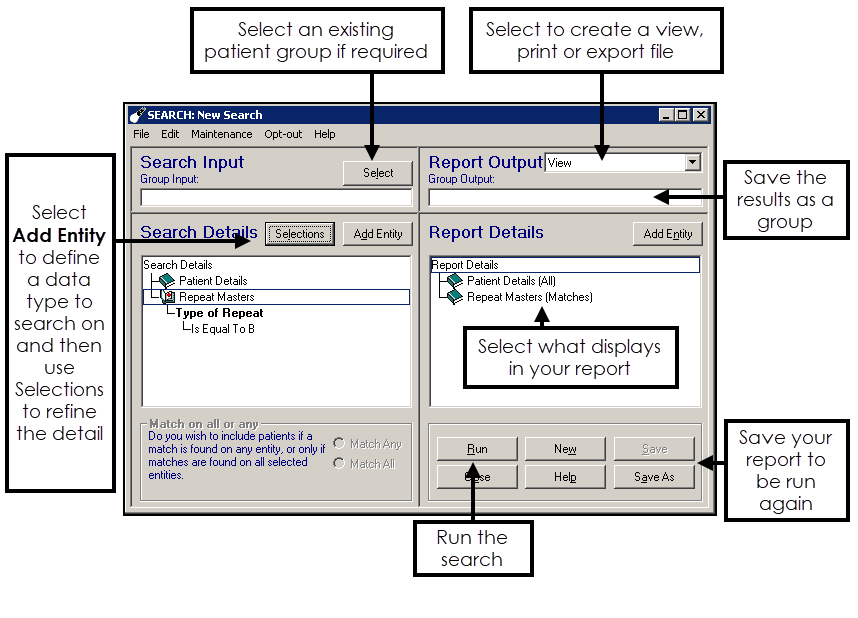
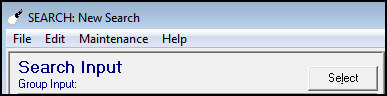
. - The SEARCH: New Search screen displays.
- Optionally, double click in Group Input to select a patient group to base the search on, for example, all diabetics. The group can be from Clinical Audit, Patient Groups or created from a previous search.See Selecting a Group for details.
- Enter the Search Details, for example, permanent and applied patients and Systolic Blood Pressure over 150.
- Define patient selection - Choose to search on all patients or for example, permanent and applied.See Patient Details for details.
- Add entity - Select the data categories you want to search on, for example, blood pressure. See Adding Entities for details.
- Add further entities as required - For example, add the weight entity to the blood pressure search to find patients with a high BMI.
- Options - This can be used to define include/exclude patients with certain criteria. For example, exclude patients with a current repeat medication in a specific drug class. See Include / Exclude Options for details.
- Define patient selection - Choose to search on all patients or for example, permanent and applied.
- Refine the Report Details.
- Add entity - This includes additional information on the report, for example, medication. See Report Details for details.
- Matches - Define whether to look at the latest entry, for example, only the patient's last blood pressure. See Matches for details.
- Add entity - This includes additional information on the report, for example, medication.
- Optionally, double click in the Group Output box to save the results as a patient group.
This allows you to use the group in a future search or generate letters/recalls. - Select from the options in Report Output. See Report Output Overview for details.
- Select Run to generate the search.
- If required, select Save to save the search for future use.
Menu Options
File
- Save and Save As - Save the report, or Save As to save under a different name.
- Report on Last Search - If you have run a search, and want now to use a different report format, use this option rather than reprocessing the search.
- Exit - Return to the Search and Report menu without saving any criteria.
Edit
- Search Details - The menu options of Add Entity, Remove Entity, Selections, Include/Exclude Options, Show Entity, Show Attribute or Show Criteria.
- Report Output - For Summary or Standard report outputs, you can Edit Report Format.
- Report Details - Shows the menu options of Add Entity, Remove Entity, or Options.
Remove Entity and Options are greyed out unless an entity is selected.
Maintenance
- Age Bands - Define the age band groupings. See - Setting up Age Bands.
Note - To print this topic select Print  in the top right corner and follow the on-screen prompts.